About a week ago I posted a picture in the Oldhammer Community on FB showing a couple of skaven I had painted with Contrast paints, super fast. To my surprise I got many comments where people asked me how I had done it, what was the recepe? Well I don’t really paint by recepe, but I would be happy to make a step by step on my approach to painting with these contrast paints!
I prepped and primed 4 old lead miniatures for this purpose in order to show some different examples instead of just demonstrate how it works on skaven fur.

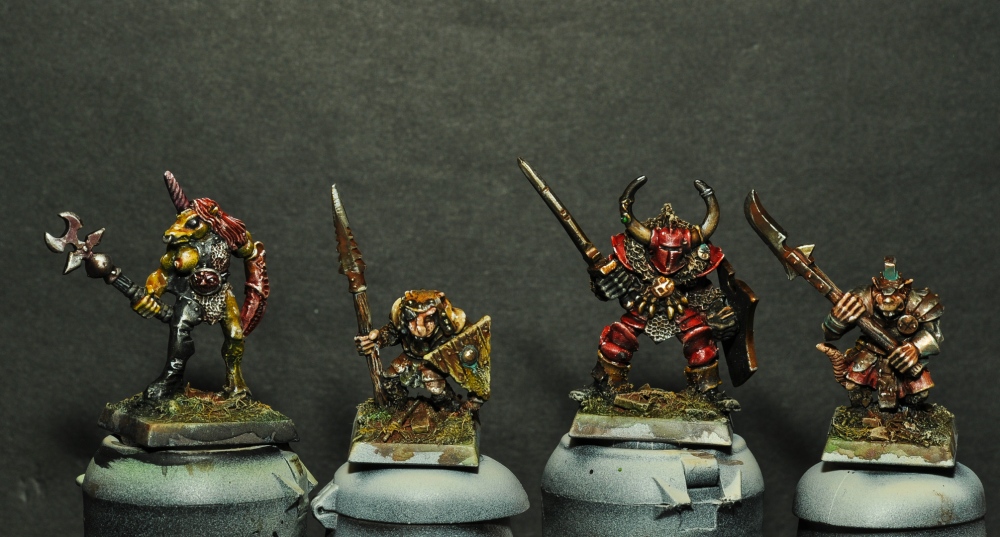
Here they are, a stormvermin, a clanrat, a slaangor and a chaos warrior. I primed them black and sprayed them from above with Wraithbone, one of the dedicated contrast primers. (The slaangor was already on my shelf, primed normal white, so he missed the wraithbone) There are 2 primers for Contrast; Wraithbone which is a warm bone like color and Grey Seer which is a cold light grey. Because the Contrast paints are transparent they are affected by the warmth of the primer underneath and they need a bright primer like white or these two, they will not work on a pure black primer. My zenithal primer here, where black is present in the lower recesses and undersides works very well with the transparency of the Contrast paints, instantly creating a natural shading on my figures.
To begin with I just block in my colors and establish my composition and color choice. Do this quite neat, because of the transparency of the paint, you don’t want to have to go back and forth with overlapping layers. I recommend to have some potted Wraith Bone or Grey Seer on hand, depending on which primer you’ve used, if you have an accident, paint the area over with your primer color and you’ll be fine. That’s why these primers come in pots as well as sprays.
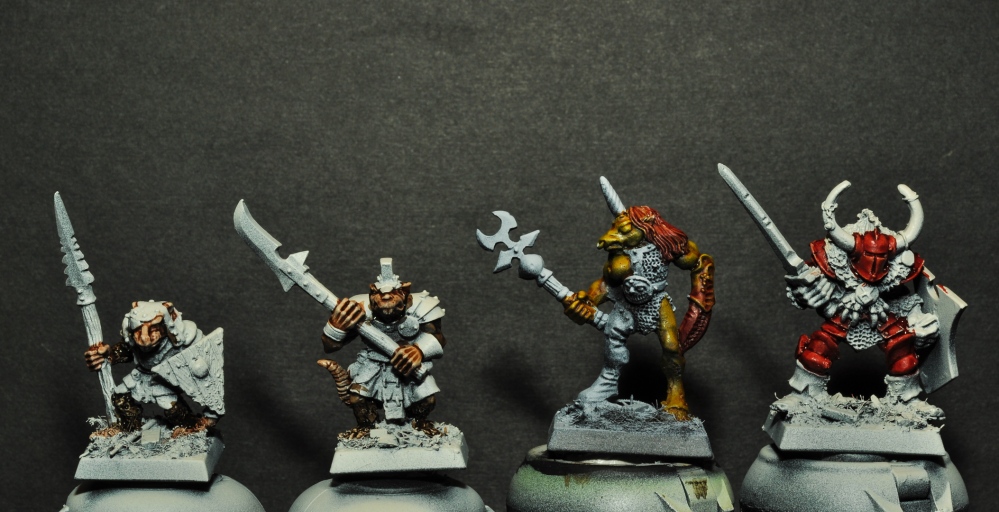
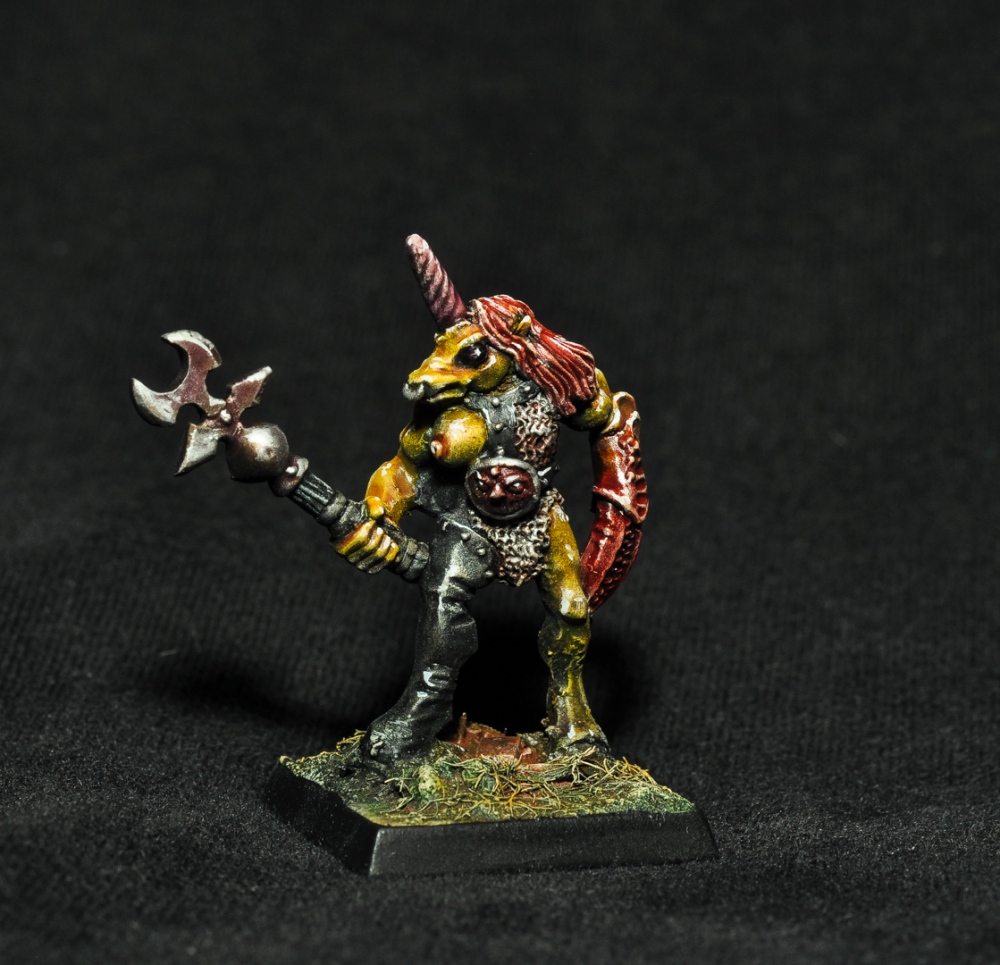
Above we can see the first few colors being blocked in. Note the wayward brushstroke on the stormvermin’s knee, I need to paint it over with wraithbone before I paint his skirt… The colors here are: Guilliman Flesh for the clanrat’s skin, Darkoath Flesh for the stormvermin’s skin, Wyldwood for skaven fur, Nazdreg Yellow for the Slaangor’s skin and finally Flesh Tearers Red for the chaos warriors armor and the hair and lobster claw on my slaangor. I applied the Fleshtearers Red on the slaangor while the Nazdreg Yellow was still wet and mixed the two colors on my figure, Contrasts are good for that kind of oilpainting like techniques.
This is the magic of Contrast paints, they are transparent, yet very vibrant. They flow a bit like washes, collecting in the recesses and getting much more intense. We can mix in some Contrast medium, thereby dilluting the color, but we keep the proporties of becoming more intense and kind of splittting off of high points of our figure. We can thin them with water and we have a paint that is really good for glazes and blending and we can mix it with both water and contrast medium for something in between. Be careful with the water though because it removes the special wash-like proporties of the paint. Don’t be shy in you application of this paint, it works best in rather thick layers and it still dries nice and smooth.

We do not have any metals in the Contrast range, so here we must still use reular paints and shade the paint accordingly.


Up until now I have only used Contrast paints except from the bases, the metal bits and a bit of regular black with which I blocked in the backs of the shields and undersides of loincloths and such.
The great thing about the contrast paint is that I now have a lot of modulation going on in my colors, without having to spend time painting a lot of light and shadow, it is already there after just blocking the colors in.

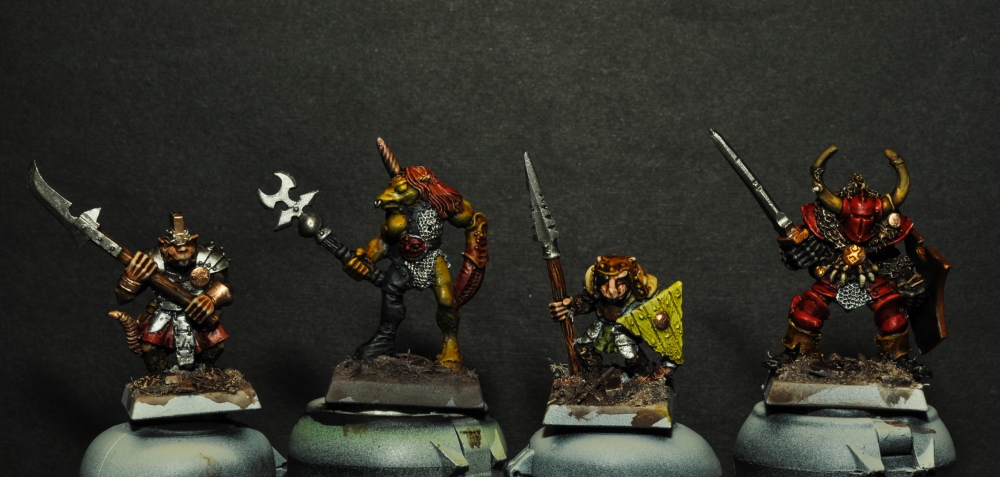
Above we see the next step. I have added extra shadows with good old Agrax Earthshade. The metals have got it obviously, since they don’t autoshade like the contrasts do. I do also deepen many shadows in the contrst painted areas, wherever I think they will be in more shadow due to the direction of the light I deepen the shadow with Agrax. Looking at them now, one could easily just fininsh them off with a wash on the bases and painting the base edges and that would be fine. I do have some more tricks up my sleeve…
First I dry brush them, by doing that I sharpen all details and contours of my figures and make them fit better within the armies I have already painted.

I use P3 Menoth White base, this is a regular paint, a nice creamy off white like the old Bleached Bone. There’s no avoiding hitting the metals here and there with this, in some places the metals just get dulled down in a nice way, in others we need to reapply the metal color. Everything is looking much sharper now. I have also given the bases some black, brown and green washes of regular paint.
Now for some individual color variations. Color variations not ony make the figures come alive in a natural looking way, they also help me tone down the dusty look of the dry brushing, wherever it might be too much. I often use GW Shades for this, but Contrasts and regular paints are also useful for this.


After these variations of color we need to pick out a few individual details. We don’t need to pick out absolutely everything, many details are suitably defined at this point, but there will always be some that need our attention. In the next step I have also finished the bases with some more washes and a final dry brush of P3 Menoth White Base and Balor Brown.
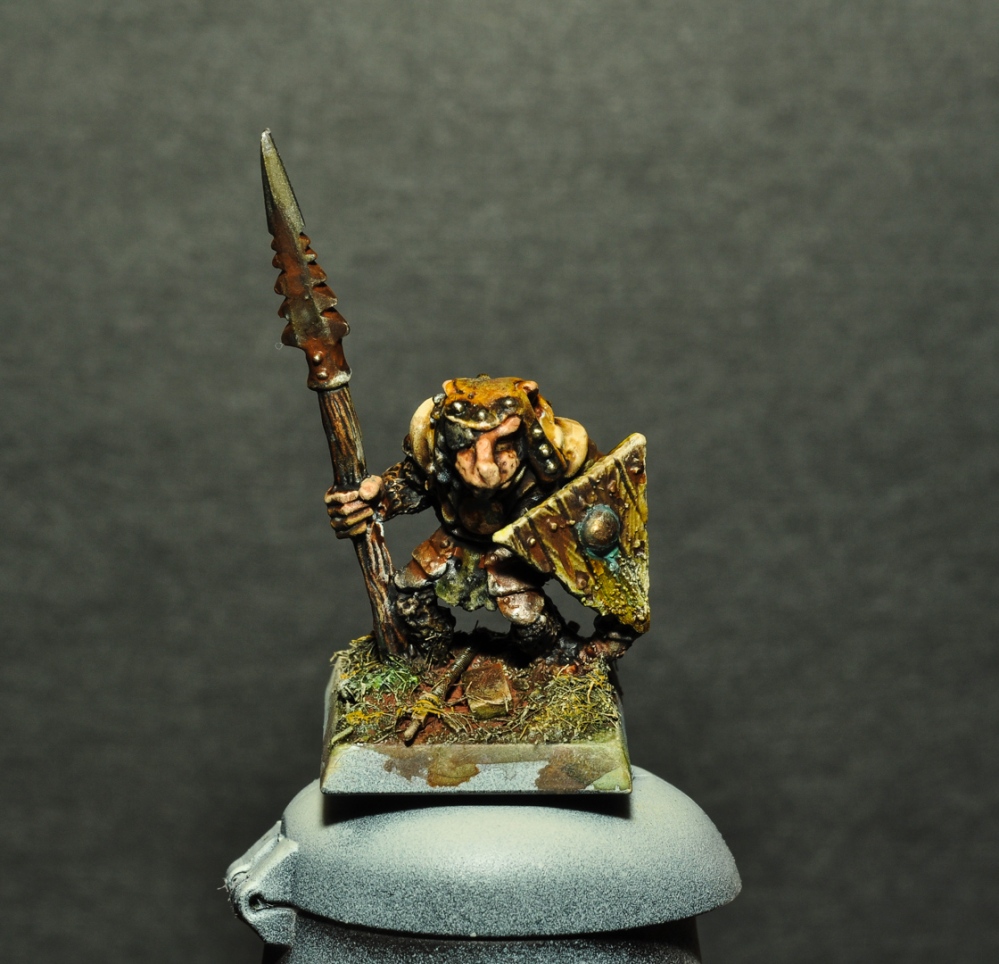


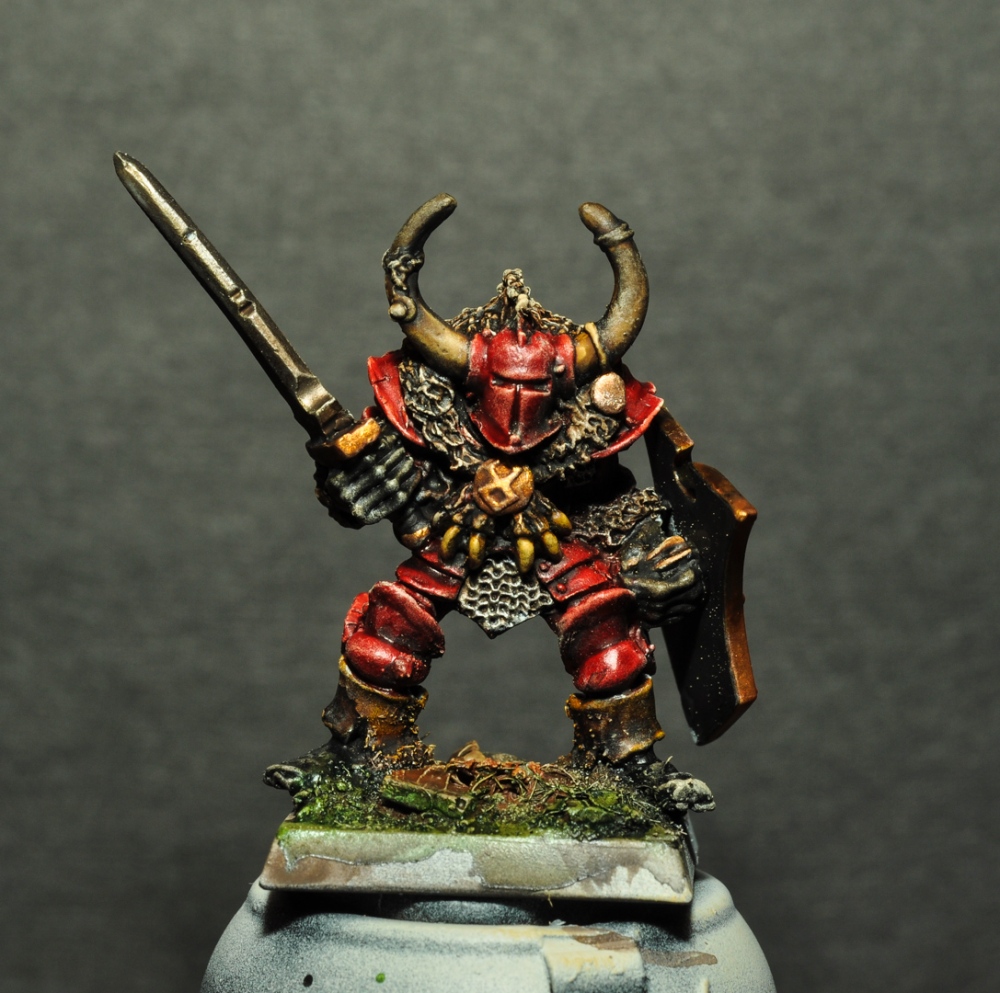
Now I only meed the final highlights! I paint small super highlights in dots and lines to show extra definition and illustrate the points of direct reflection. The metals get the same, edges and points of direct reflection in silver. For this I use silver on any metal since it depicts the shine of the metal and not it’s color, which can be found in the mid tones, fading away again in the shadows.
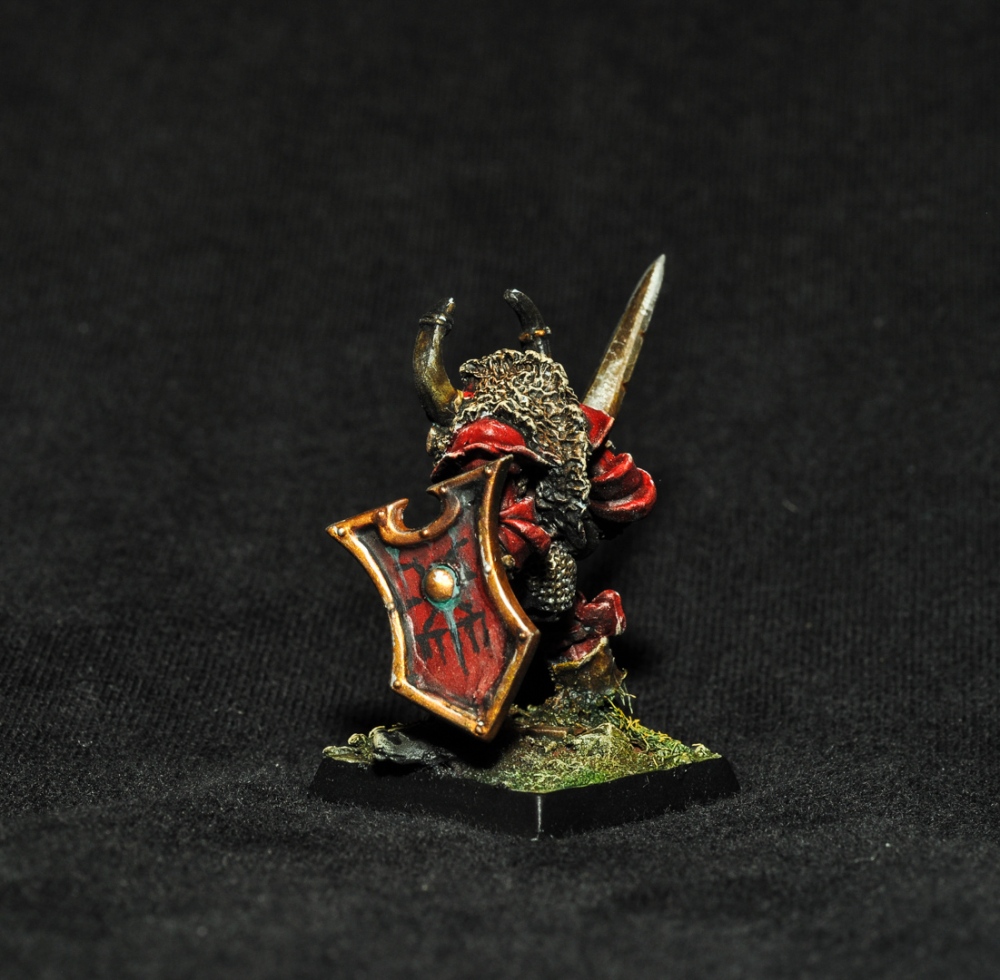
I paint my base edges black and I always give my Oldhammer figures a blast of matt varnish from my airbrush. On top of that I gave the green gem on the chaos warrior’s bauble a dot of gloss varnish. I also gave the slaangor’s eyes gloss varnish so they became like black gems or maybe even insect eyes… His lobster claw got some gloss varnish too.


All done in one lazy sunday incloding photos and write-up.
Contrast paints really help to speed up things. Looking back on this post I think it looks like a lot of work, but in reallity it was pretty fast and effortless, but I realize that it can be done even faster even more simple on certain figures. Funnily enough I find these Contrast paints especially useful on old lead miniatures because of the intricate detail and texture, they do not have the smoothness of plastics and this lack of smoothness really helps when painting with contrasts.
You dont need the entire range, just build up a collection a little at a time with whichever colors take your fancy and implement them gradually. They do change the way we paint but you still need regular paints and the techniques for these. They are certainly a big new tool for the toolbox and I just love to use mine.
I hope this has been inspirational and informative. I can certainly recommend anyone to try out the Contrast paints they are fast and fun to use!
-Kristian

Thanks for this excellent tutorial! It is good to see how people use the contrast paint, particular such a skilled painter as yourself. I will have to give some of them a try!
LikeLiked by 1 person
Thanks Eric! Do try it for yourself, a bit of a different way of working, but highly recommended.
LikeLike
Thank you for that interesting post. It really helps alot to make me understand how they work. Also I like to become better at painting and I will come back to read this a few times more. Oh and nice minis btw!
LikeLiked by 1 person
Thanks, I am happy to hear that! I am looking forward to see what you will make with these paints. 😊
LikeLike
Nice work – I especially like how your Stormvermin and Chaos champion came out!
LikeLike
Thanks mate, i am Happy that you like it. 😊
LikeLiked by 1 person
Great tutorial!
It’s a lot of fun to experiment with this new type of paint.
The bright red and yellow on the two chaos miniatures are really nice.
LikeLiked by 1 person
Thank you Helge! I think Flesh Tearers Red is my new favourite colour. 😊 Great fun to experiment with these new paints.
LikeLike